Preface
Starting from some unknown point in time (actually, I can't remember), servers in mainland China have been unable to directly connect to Docker Hub (docker.io). This is undoubtedly a blow to all mainland servers. Fortunately, there are more and more proxy services, so it's not completely unusable.
However, ghcr.io, the Docker image service provided by GitHub, which shares the same fate as Docker Hub, doesn't have many proxy services available. Even if someone sets one up, it often cannot access private repositories (this is basically due to login failures).
Because two projects use ghcr and have private repositories, mainland servers completely cannot pull them, or the pulling is very slow, making it impossible to use mainland servers for load balancing. I have been desperately searching for a proxy solution for ghcr. Coincidentally, I recently found Harbor, an enterprise-level private Docker registry, and tried setting it up.
EP0: Prerequisites
Configuring the Server
First, you need:
- A server, preferably Linux, preferably not Windows
- An SSH remote tool, such as Termius, Tabby, or XShell (can be ignored for local deployment)
- A domain name (recommended). If deploying in mainland China and planning to use a domain name, please complete the ICP filing in advance.
Harbor is a program that runs based on Docker, so the server needs Docker installed beforehand. If the server is in mainland China, you also need to configure a proxy in advance; otherwise, subsequent steps may fail. For this, you have the following options:
Downloading the Installer Package
Open Harbor Releases. You will see content similar to the following in the Release section.
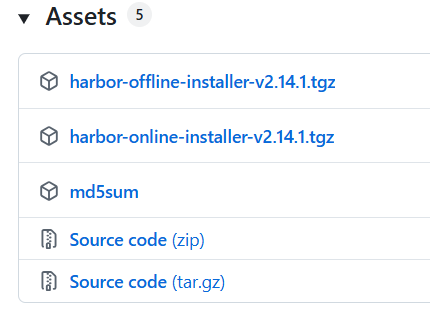
harbor-offline-installer-v<version>.tgz is the offline installer package. harbor-online-installer-v<version>.tgz is the online installer package. Please deploy according to the actual latest version.
This tutorial uses the online version. If your server really cannot connect to Docker Hub, please use the offline version. There is no difference in usage between the two. The difference is that the online installer pulls images from Docker Hub before deployment, which is relatively more lightweight, and the local files will be cleaner.
Download the file to the server and extract it. At this point, a folder named harbor will appear.
Enter the harbor folder. If the directory contains the following content (and nothing is missing), we have completed the first step.

All files
EP1: Configuration
From this point on, the tutorial will be written based on my preferred software. Please modify the relevant command-line instructions according to your habits.
Rename harbor.yml.tmpl to harbor.yml
Copy harbor.yml.tmpl and change its name to harbor.yml. Do not directly rename the file to avoid serious consequences due to accidental deletion of content.
CodeBlock Loading...
Modify the Password
Open harbor.yml.
CodeBlock Loading...
Find harbor_admin_password.

Change Harbor12345 to another string. Please remember this string, as it will become the initial password for the Admin account used to log into the web console later.
Also, it is recommended to change database.password to another string (as shown in the image below). This string will become the access password for the database that Harbor will deploy later, but you do not need to remember it.

Modify the Access Address
At the top of harbor.yml, find hostname.
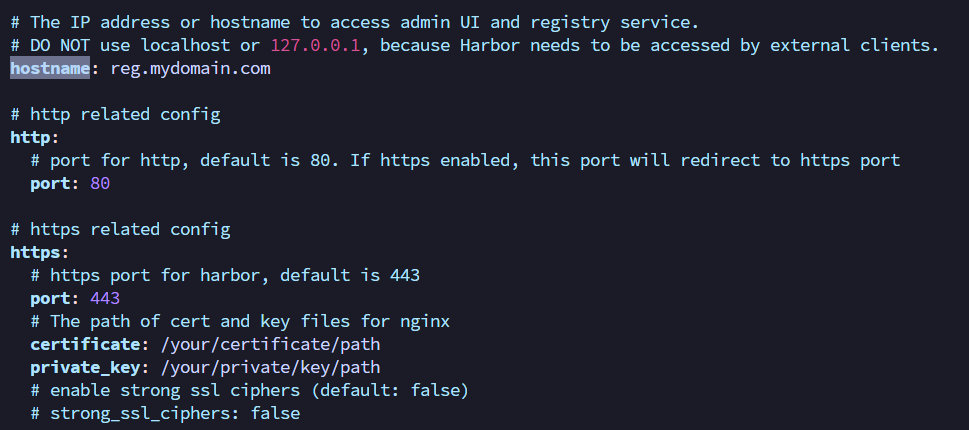
Change hostname to the actual access address. This does not have to be a domain name; you can write the server's IP.
Configuring Ports
Due to various reasons, there are generally three scenarios:
Save harbor.yml
After completing the above configurations, press esc, type :wq. At this point, the modifications to harbor.yml are complete.
EP2: Running the Installation Script
Use the command line to execute the following command.
CodeBlock Loading...
Now the installation process begins.
When Harbor has been installed and started successfully. appears, the entire installation is complete.
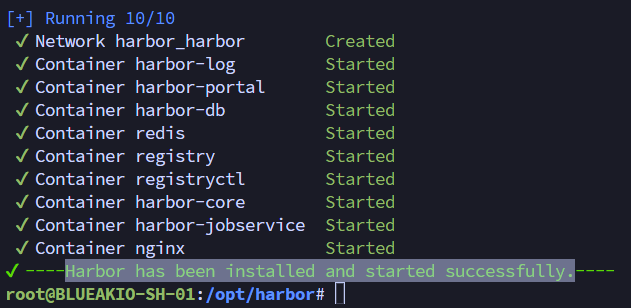
At the same time, the entire service is already running.
EP4: Accessing the Web Interface
I can't count the number between 2 and 4
Based on the hostname and port you configured, access your Harbor in a browser.
Then you will see the following interface.
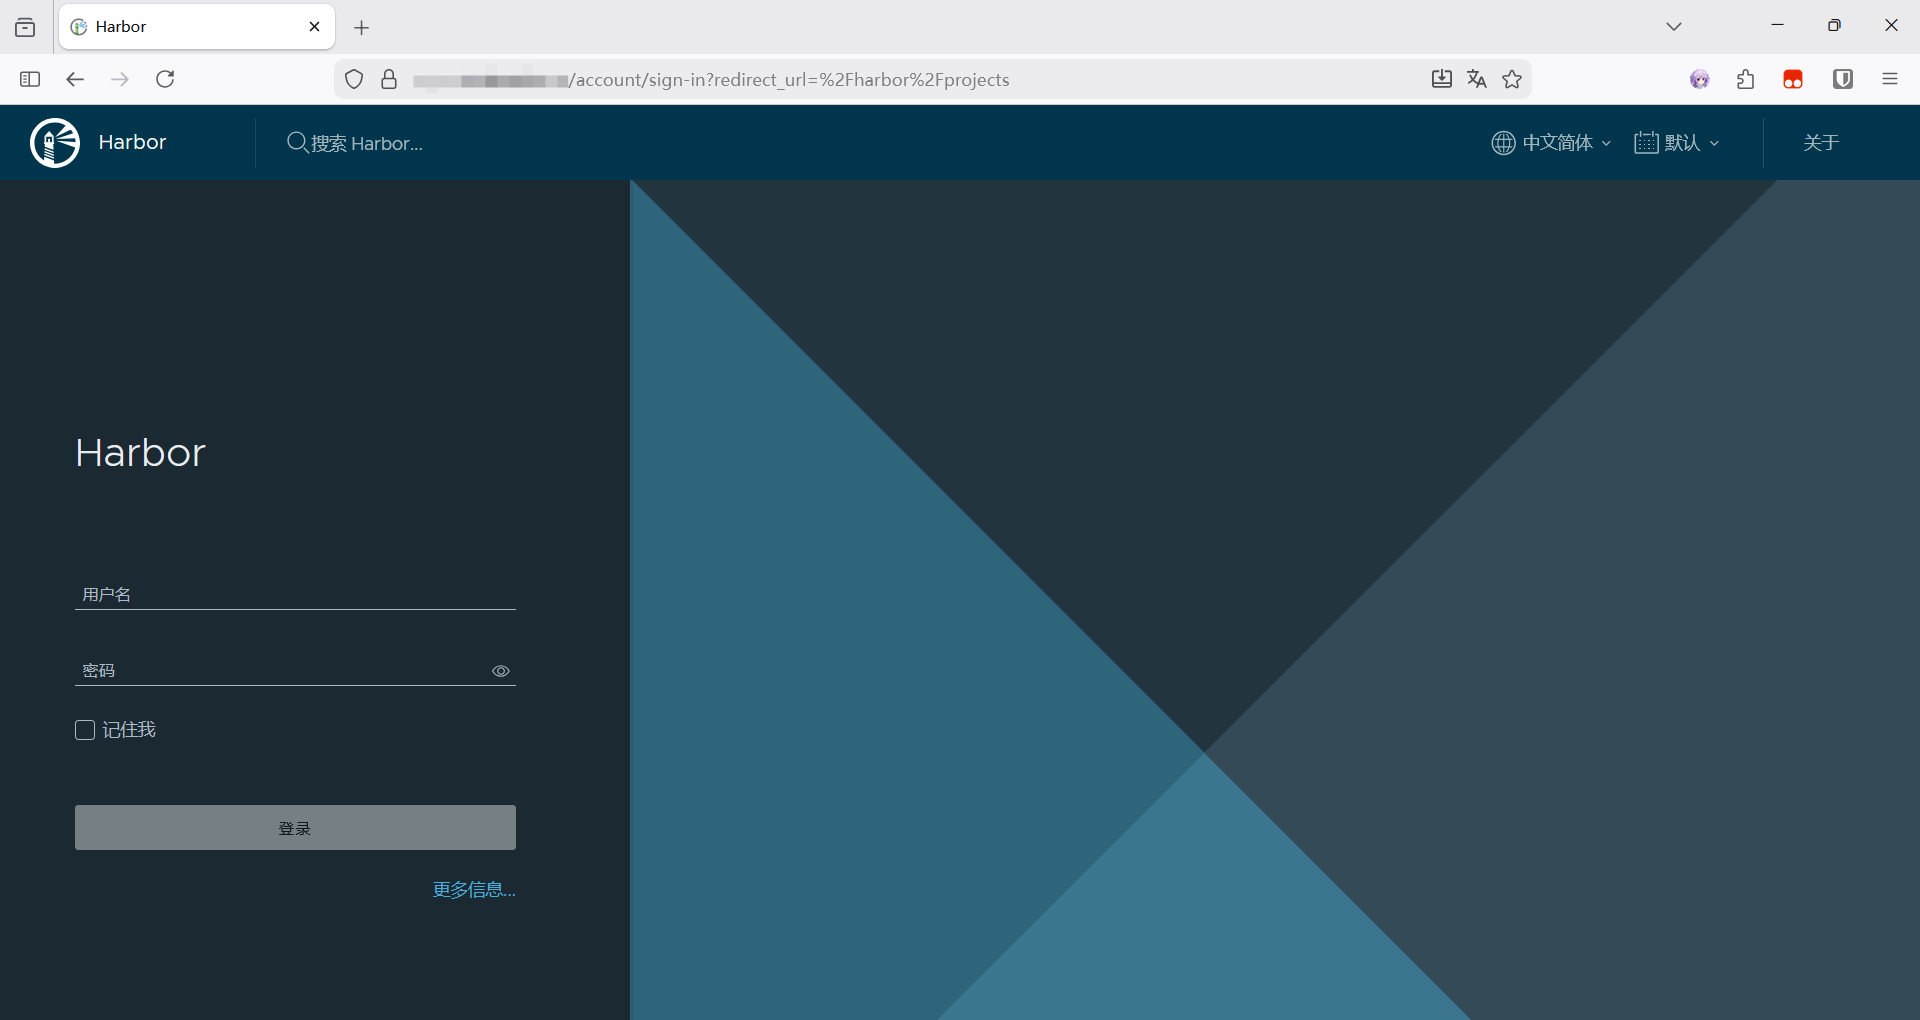
Log in. The initial account (or Admin account) username is admin, and the password is the harbor_admin_password you set earlier.
After logging in, you will see the following interface.
At this point, it can be confirmed that the entire Harbor service is running normally.
EP5: Security Operations
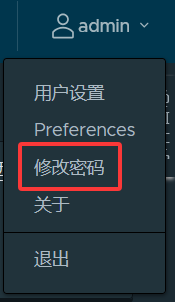
Change the Admin Account Password
Although the default password has been changed in harbor.yml, for security, it is still necessary to change the password once on the web interface.
Click the user icon in the top right corner, then click Change Password. Fill in all required fields in the pop-up form.
Create a New User
Although not strictly necessary, for security, I still recommend creating a new user specifically for Docker to log into your account.
Click User Management on the left, then click Create User. Fill in all required fields in the pop-up form.

EP6: Logging into Docker
In the command line, enter:
CodeBlock Loading...
Then an interactive prompt will appear.

First, fill in Username (the username you set when creating the user), press Enter, then fill in Password (the password you set when creating the user; the password will not be displayed as you type), and press Enter.
If the credentials are correct, the following content will appear.
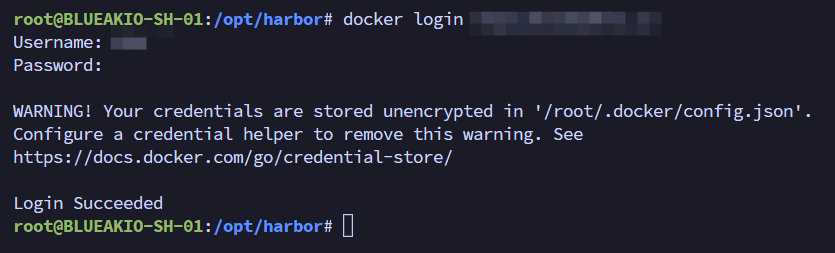
At this point, your server is connected to your Harbor, and all kinds of pushes and pulls (including private repositories) are unobstructed.
EP-S-1: Configuring Proxy
If the server you deployed is located in mainland China, then you do not need and cannot deploy a proxy based on this section.
Associating with Other Services
After logging into your Harbor web interface, click Registry Management on the left page, then click New Endpoint.
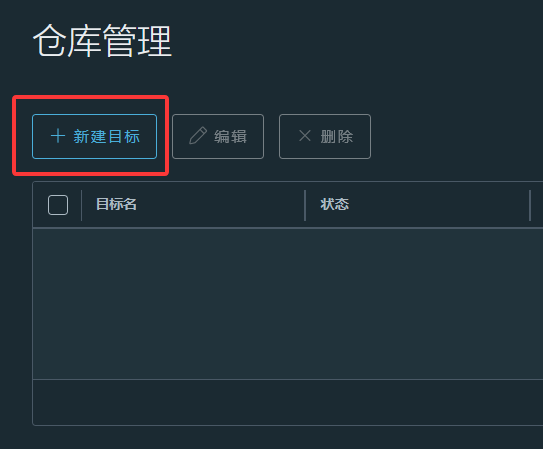
A New Endpoint window will pop up.
Adjust the Provider option; you will see 12 options.
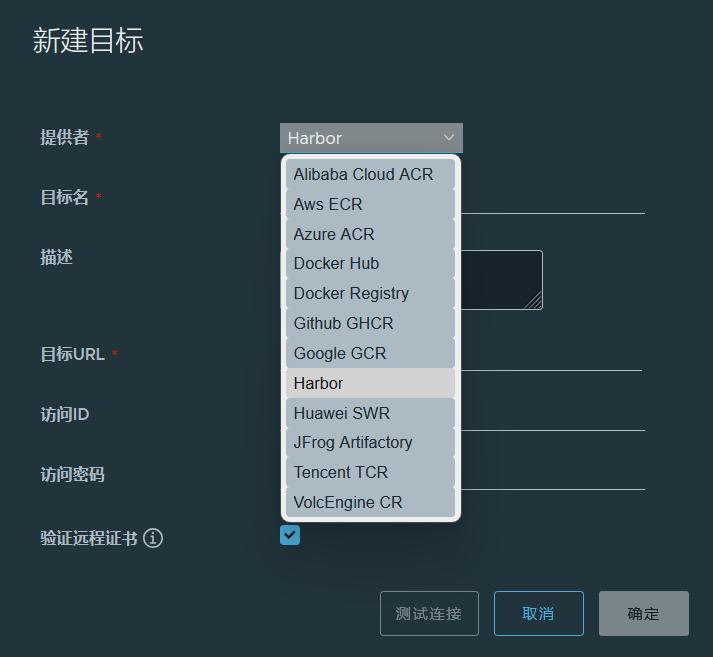
If you choose harbor or Docker Registry, you need to fill in the corresponding service's address (i.e., Endpoint URL). If you choose any option other than these two, you do not need to fill in the service address.
Here, we use GitHub GHCR as an example (not Google GCR, be careful, their addresses differ by only one letter).
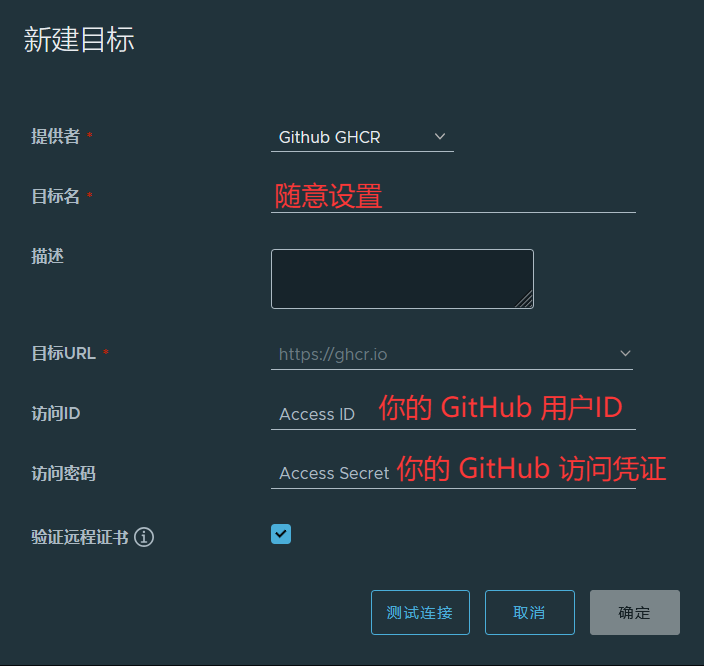
(For how to obtain a GitHub access token, please visit https://github.com/settings/tokens.)
After configuration, click OK.
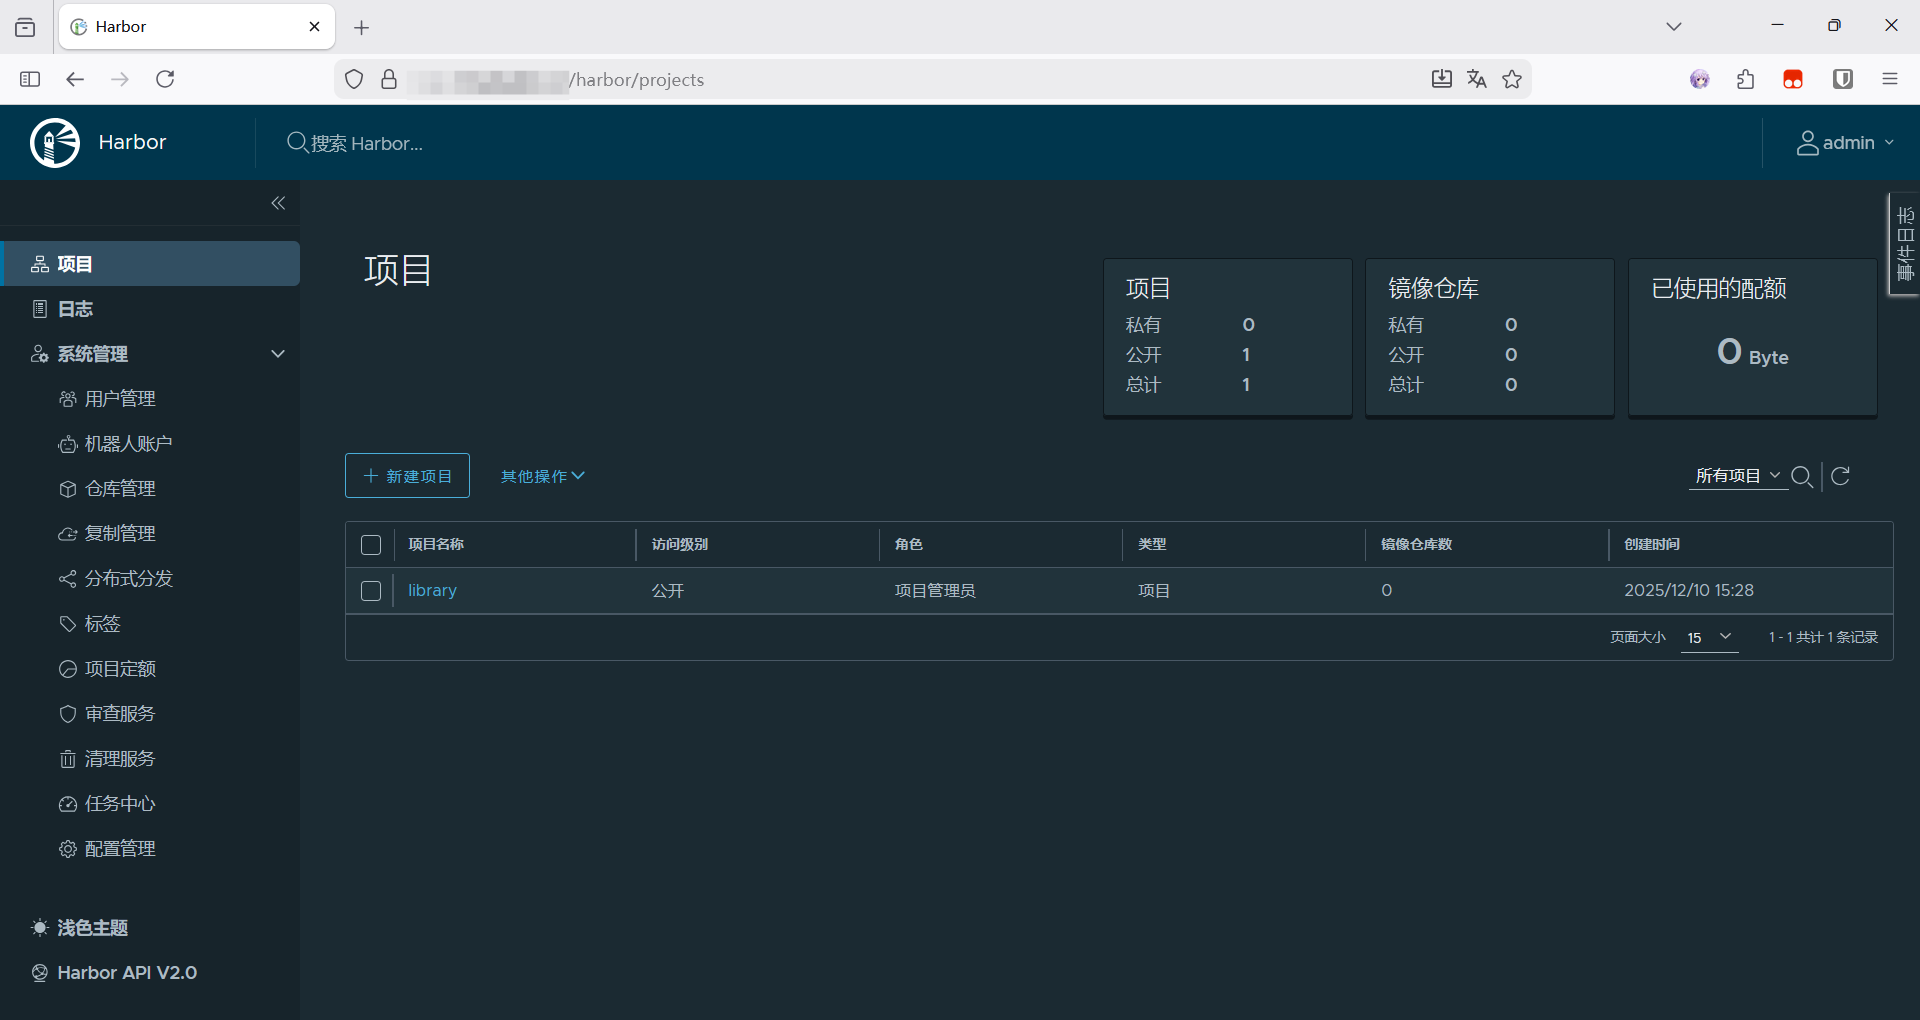
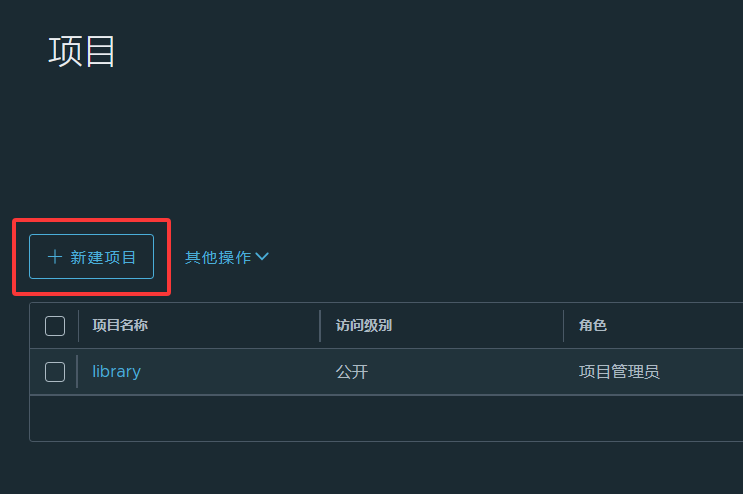
Setting Up a Project
What is a "project"? In Harbor, a project is equivalent to a separate storage location. It points to where images are stored. Access management (i.e., whether an image is public or private) is determined on a per-project basis, not per image, which is different from many Docker cloud services.
Click Projects on the left page, then click New Project.

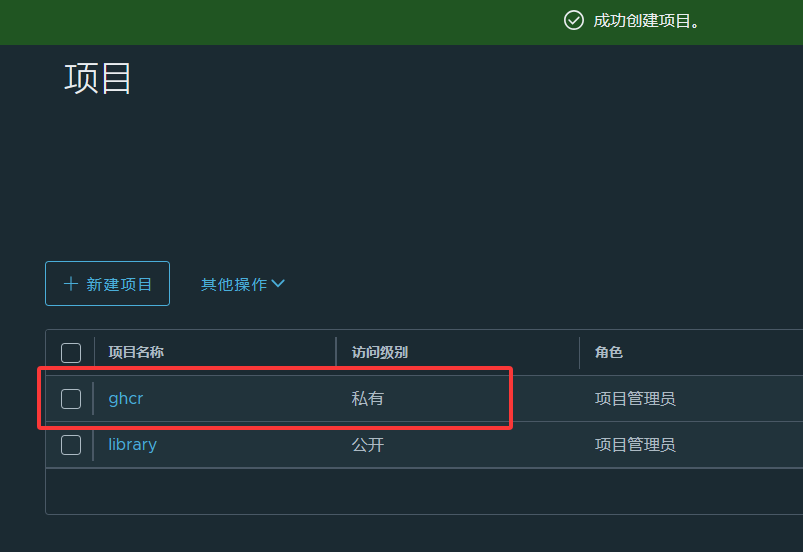
Then click OK, and the project setup is complete.
END: Pulling Images
Taking ghcr.io and the project name ghcr configured in the image above as an example, assuming the original address is:
CodeBlock Loading...
After Harbor's proxy, the address will become:
CodeBlock Loading...
That is, replace ghcr.io with <hostname>:<port>/ghcr.
Subsequent operations are no different from those with the original address.
Afterword
Is it overkill to set up Harbor just for a proxy? Personally, I think it is indeed overkill which implies I wanted to tinker
Some might ask why not use Docker Registry. Considering that it is essentially just a storage repository with no web console, no proxy functionality, and requires you to upload images yourself, it still seems quite troublesome (although using Harbor is also troublesome, but using Harbor is somewhat clever is it really clever?
Related Links
- Harbor Official Website: goharbor.io
- Harbor GitHub Repository: goharbor/harbor
(No domain names were harmed in the writing of this tutorial.)